How to Create a UDF with KF Rules
In this example, we use Knowledge Fusion rules to drive a UDF. We also use Knowledge Fusion to customize a UDF menu.
Step 1
Create a UDF part.
-
Create a new part file, using File->New, and name it udf_rule.prt.
-
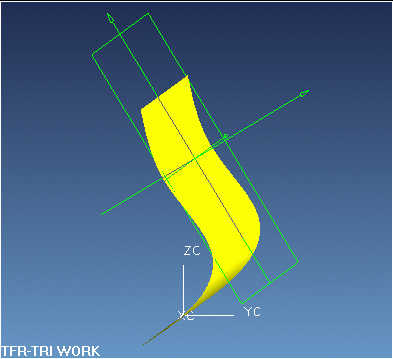
Choose right-click->Orient View->Trimetric in the graphics window.
-
Choose Application->Modeling.
Step 2
Create a spline for a reference surface.
-
Choose Insert->Curve->Spline->Through Points.
-
Accept the default values for the spline creation and select OK.
-
Choose the Point Constructor and enter in the following points:
Point1: X = 8, Y = -2, Z = 14
Point2: X = 8, Y = 1, Z = 11
Point3: X = 8, Y = 3, Z = 7
Point4: X = 8, Y = 0, Z = 0
Step 3
Create a reference surface.
-
Choose Insert-> Design Features->Extrude.
-
Choose Extrude Dialog.
-
Pick the spline for the section string.
-
Accept the default direction.
-
Enter -10 in the Start Distance box and 10 in the End Distance box. Choose OK to create the surface.
Step 4
Name the Face. Knowledge Fusion can reference native NX geometry by name. By naming the face, we can reference this face in Knowledge Fusion without using adoption.
-
Choose Edit-> Properties-> Class Selection.
-
Select Type->Face in the Class Selection dialog.
-
Select the face and choose OK.
-
On the General tab, enter front in the Name box.
-
Choose OK.
-
To view the name, Select Preferences->Visualization->Names/Borders.
-
Turn ON View of Definition.
Step 5
Create Knowledge Fusion Rules.
-
Display the Knowledge Fusion Navigator.
-
Create the following Knowledge Fusion attributes under root using Add Attribute in the Knowledge Fusion Navigator:
|
Input and Menu Parameters
|
|
Name
|
Type
|
Formula
|
|
RotationAngle
|
Number
|
0
|
|
ProjectionVector
|
Vector
|
vector(0,-1,0)
|
|
Origin
|
Point
|
point(4,7,7)
|
|
FaceName
|
String
|
"front"
|
|
RotationAngle_label
|
String
|
"Angle"
|
|
ProjectionVector_label
|
String
|
"Vector"
|
|
Origin_label
|
String
|
"Origin"
|
|
FaceName_label
|
String
|
"Face Name"
|
|
input_parameters
|
List
|
{RotationAngle,ProjectionVector,Origin,FaceName}
|
Note:
Make all of the attributes listed in the following table uncached. This ensures that the plane updates when the surface geometry is modified. To make an attribute uncached, select the uncached toggle at the bottom of the Add Attribute menu.
|
Rules
|
|
Name
|
Type
|
Formula
|
|
FaceSelection
|
List
|
ug_refObjectByName(facename:, {ug_face}, "");
|
|
LocatorOnSurface
|
List
|
ug_face_askPointParametersAtPoint(first(FaceSelection:),Origin:,projection_vector,projectionvector:);
|
|
PointOnFace
|
Point
|
ug_face_askPointOnFace(first(FaceSelection:),LocatorOnSurface:);
|
|
FaceNormal
|
Vector
|
ug_face_askNormal(first(FaceSelection:),LocatorOnSurface:);
|
|
x
|
Vector
|
RotateVector(vector(-1,0,0); RotationAngle:; FaceNormal:);
|
|
y
|
Vector
|
RotateVector(x:; -90; FaceNormal:);
|
Note:
To create a menu item, a string attribute with the name of the attribute followed by "_label" is needed. This attribute will set the name label shown in the UDF menu. The "input_parameters" list attribute defines the UI objects (fields) that will be displayed in the menu. For example, to create the menu shown in Figure 1, the following attributes are needed. Do not create the following attributes in your exercise, they are just an example:
|
Menu Example
|
|
Name
|
Type
|
Formula
|
|
Name
|
Name
|
MyName
|
|
Name_label
|
String
|
"Name:"
|
|
Input_parameters
|
List
|
{Name}
|
Step 6
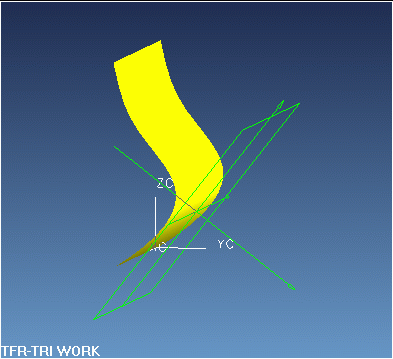
Creating the Knowledge Fusion Datums.
-
Create the following Child Rules using Add Child Rule in the Knowledge Fusion Navigator:
|
Children
|
|
Name
|
Class
|
Thru_point
|
Direction
|
|
ReferencePlane
|
ug_datum_plane
|
PointOnFace:
|
FaceNormal:
|
|
Xaxis
|
ug_datum_axis
|
PointOnFace:
|
x:
|
|
Yaxis
|
ug_datum_axis
|
PointOnFace:
|
y:
|
|
Zaxis
|
ug_datum_axis
|
PointOnFace:
|
-FaceNormal:
|

Step 7
Create the UDF.
-
Choose File->Export->User-Defined Feature.
-
Enter udf_rule in the UDF's name box.
-
Capture the tri-metric view for the image.
-
Add in the datums into the UDF. Do not add the extruded feature.
Step 8
Create a part to use the UDFs.
-
Create a new part file, using File->New, and name it base.prt.
-
Choose right-click->Orient View->Trimetric in the graphics window.
-
Choose Application->Modeling.
Step 9
Create a spline for a reference surface.
-
Choose Insert->Curve->Spline->Through Points.
-
Accept the default values for the spline creation and select OK
-
Choose Point Constructor and enter in the following points:
Point1: X = 8, Y = 0, Z = 10
Point2: X = 8, Y = 1, Z = 7
Point3: X = 8, Y = 3, Z = 4
Point4 X = 8, Y = 0, Z = 0
Step 10
Create a reference surface.
-
Choose Insert-> Design Features->Extrude.
-
Choose Extrude Dialog.
-
Pick the spline for the section string.
-
Accept the default direction.
-
Enter -10 in the Start Distance box and 10 for the End Distance box.
Step 11
Name the face.
-
Choose Edit-> Properties-> Class Selection.
-
Choose Type->Face on the Class Selection dialog.
-
Select the face.
-
Enter front in the Name box.
-
Choose OK.
-
To view the name, choose Preferences->Visualization->Names/Borders.
-
Turn on View of Definition.
Step 12
Insert the UDF.
-
Select Insert-> Form Feature-> User Defined Feature.
-
Choose udf_rule for insertion.
-
Notice the menu that was built by Knowledge Fusion.
-
Accept the defaults and Select OK to create the UDF.
Step 13
Modify the UDF.
-
choose Edit->Feature->Parameters.
-
Select the udf_rule feature to edit.
-
Change the Origin to a value of (4,4,2).
-
Notice that the planes update to the new location on the surface.
Synopsis
Knowledge Fusion rules added into a UDF are demanded when the UDF is added or changed. In this example, a set of planes were created that remained normal to a face. If the face changes or the plane's location changes, the normals update. You could then create geometry off of these planes. For example, you can create a sketch associated to these planes and then the extrude the sketch. This sketch remains associated to the planes and updates as the planes update.